In this article, I will show you how to work with MongoDB and Kotlin coroutines in a Ktor application.
Note: this article was created based on one of the services we implement in my Ktor Server Pro course. If you would like to learn how to expose a fully functional REST API, secure the application, and many many more, then don’t hesitate and secure your spot today
Before we start, I just wanted to mention that at the moment of writing KMongo is officially deprecated! Maybe you saw my previous article, maybe you saw some outdated content in some other places. Either way, we should not use that library anymore in favor of the official driver that comes in two flavors:
MongoDB Kotlin Driver (for applications using coroutines)
MongoDB Kotlin Sync Driver (for apps that require synchronous processing)
Create & Verify MongoDB Instance
If you already have a MongoDB instance installed on your machine, feel free to skip this step.
On the other hand, if that is not the case, you can install it using the official manual. Or, if you just like me have a Docker environment, you can run the following command:
docker run —name my_awesome_mongo_name -d -p 27017:27017 mongo:8.0.4
This way, we run the Mongo docker container and expose it’s port 27017 .
And to verify it running, we can run the docker ps :
CONTAINER ID IMAGE COMMAND CREATED STATUS PORTS NAMES
9ecd8986ac34 mongo:8.0.4 «docker-entrypoint.s…» 20 seconds ago Up 19 seconds 0.0.0.0:27017->27017/tcp my_awesome_mongo_name
As we can see, it was created successfully and we should be able to connect to it at localhost:27017
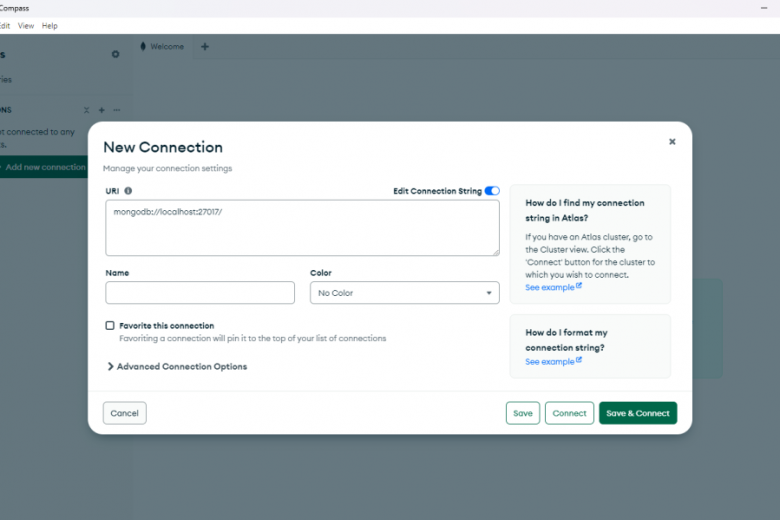
We can assert that, as well, for example with a free and official tool- MongoDB Compass:
And if we are able to connect, it means that we can head to the next step.
Create a New Ktor Project
Nextly, let’s navigate to the Ktor Project Generator page to create a fresh project from scratch.
If you use the IntelliJ Ultimate Edition, then you can generate it in your IDE
As we can see, we will be using Ktor 3.1.0 with Netty and configuration in the YAML file.
The important thing to mention here is that if we want to work with Kotlin coroutines, we should not select the below MongoDB plugin:
Because as we can see, this adds the MongoDB Kotlin Sync Driver for synchronous processing:
So, in our case, to keep our Ktor application as vanilla as possible, we will not add any additional plugins.
With that done, let’s hit the Download button and let’s import the project to our IDE.
Add MongoDB Async Driver to Ktor
Before adding the necessary import, let’s perform a small cleanup.
Firstly, let’s remove the Routing.kt file- we don’t need it for this tutorial.
Then, let’s navigate to the Application.kt and let’s get rid of routing config, as well. Eventually, we should have something like that:
package com.codersee
import io.ktor.server.application.*
fun main(args: Array<String>) {
io.ktor.server.netty.EngineMain.main(args)
}
fun Application.module() {}
With that done, let’s add the MongoDB Kotlin Driver to work with coroutines.
During the configuration, we decided to use the Gradle version catalog. So now, we must navigate to the libs.versions.toml inside the gradle directory and add the mongodb-version along with mongodb-driver-kotlin:
[versions]
kotlin-version = «2.1.10»
ktor-version = «3.1.0»
logback-version = «1.4.14»
mongodb-version = «5.3.1»
[libraries]
ktor-server-core = { module = «io.ktor:ktor-server-core-jvm», version.ref = «ktor-version» }
ktor-server-netty = { module = «io.ktor:ktor-server-netty», version.ref = «ktor-version» }
logback-classic = { module = «ch.qos.logback:logback-classic», version.ref = «logback-version» }
ktor-server-config-yaml = { module = «io.ktor:ktor-server-config-yaml», version.ref = «ktor-version» }
ktor-server-test-host = { module = «io.ktor:ktor-server-test-host», version.ref = «ktor-version» }
kotlin-test-junit = { module = «org.jetbrains.kotlin:kotlin-test-junit», version.ref = «kotlin-version» }
mongodb-driver-kotlin = { module = «org.mongodb:mongodb-driver-kotlin-coroutine», version.ref = «mongodb-version» }
[plugins]
kotlin-jvm = { id = «org.jetbrains.kotlin.jvm», version.ref = «kotlin-version» }
ktor = { id = «io.ktor.plugin», version.ref = «ktor-version» }
With that done, let’s navigate to build.gradle.kts and add the following line:
implementation(libs.mongodb.driver.kotlin)
Lastly, let’s sync the gradle project so that the necessary libraries are fetched.
Introduce Model Classes
Before we can start working with coroutines, we must prepare classes that will be translated into Mongo documents and vice versa.
To do so, let’s create the Product.kt class and put the following:
import org.bson.codecs.pojo.annotations.BsonId
import org.bson.types.ObjectId
data class Product(
@BsonId
val id: ObjectId? = null,
val name: String,
val description: String,
val price: Double,
val category: ProductCategory,
val tags: List<ProductTag>,
)
enum class ProductCategory {
VIDEO_GAMES, TOOLS, HOME_AND_KITCHEN, FOOD
}
enum class ProductTag {
EXCLUSIVE, HANDMADE, ORGANIC, BESTSELLER
}
As we can see, all fields except the id field are plain Kotlin classes. And later, they will be serialized/deserialized 1:1 when saving and retrieving from the database.
When it comes to the id field, we mark it using the @BsonId annotation. Thanks to that, it will be serialized to the _id BSON field that represents a primary key of our document. Moreover, we assign a default null value to it. This way, the value will be generated automatically.
Configure Ktor Connection to MongoDB
As the next step, let’s connect our Ktor application to the Mongo instance.
And for that purpose, let’s navigate to Application.kt and implement the following logic:
fun Application.module() {
val settings = MongoClientSettings.builder()
.applyConnectionString(
ConnectionString(«mongodb://localhost:27017»)
)
.build()
val client = MongoClient.create(settings)
val database = client.getDatabase(«application»)
val productCollection = database.getCollection<Product>(«products»)
}
Firstly, we instantiate the MongoClientSettings builder. A builder that allows us to configure the connection string for our database. Additionally, if you are looking for more configuration options, like reads or writes repetition, then you should start in there.
Then, we create a new client and pass our settings to it. If you would like to, then you could use another variant of the create function that takes the connection String as an argument:
public fun create(connectionString: String): MongoClient
But, in my opinion, using the builder approach is a better choice in terms of extensibility.
With that done, we get the instance of our database, by passing its name. Lastly, we obtain the MongoCollection that we will be injecting later into the product repository. Again, we pass the name of our collection, too.
To verify, let’s run our application.
As a result, we should see the following text in the logs indicating that everything is perfectly fine:
[cluster-ClusterId{value=’67bd5f4689251d25d5077fb7′, description=’null’}-localhost:27017] INFO org.mongodb.driver.cluster — Monitor thread successfully connected to server with description ServerDescription{address=localhost:27017, type=STANDALONE, cryptd=false, state=CONNECTED, ok=true, minWireVersion=0, maxWireVersion=25, maxDocumentSize=16777216, logicalSessionTimeoutMinutes=30, roundTripTimeNanos=26289200, minRoundTripTimeNanos=0}
MongoDB Coroutines CRUD Operations
After we did all of that preparation, we can finally create the ProductRepository class:
class ProductRepository(
private val productCollection: MongoCollection<Product>,
) { }
And inject the collection in Application.kt :
val productRepository = ProductRepository(productCollection)
The constructor injection is a great way to make our code easier to test in the future.
Anyway, coming back to the topic, let’s learn how we can how we can perform basic CRUD operations with coroutines.
Persits Products
Initially, our products collection is empty, so let’s add the following code to start populating it:
suspend fun save(product: Product): Product? {
val result = productCollection.insertOne(product)
return result.insertedId
?.let { product.copy(id = it.asObjectId().value) }
}
First of all, we must make our function suspend. Why? Because the insertOne we use is a suspend function, so we must invoke it either from the coroutine or another suspend function.
When it comes to the persisting- the function that we use returns the InsertOneResult that allows us to either get a boolean informing if the write was acknowledged or the generated identifier of the saved product. And in my opinion, reading that and returning a Product instance with the updated field is a quite nice approach.
After that, let’s get back to the Application.kt and test this function:
val saved = runBlocking {
productRepository.save(
Product(
name = «Product 1»,
description = «Description 1»,
price = 19.99,
category = ProductCategory.TOOLS,
tags = listOf(ProductTag.EXCLUSIVE, ProductTag.BESTSELLER)
)
)
}
println(saved)
I know, the good, old println
Anyway, if we run our application, we should see the following in the logs:
Product(id=67bd62f974edd96bbd59874a, name=Product 1, description=Description 1, price=19.99, category=TOOLS, tags=[EXCLUSIVE, BESTSELLER])
Additionally, when we hit the refresh button in MongoDB Compass, we should see the following:
And this proves that not only the Product was saved. But also, the application database and products collection was created by our client automatically.
Find By ID
Nextly, let’s implement the function to fetch product by identifier:
suspend fun findById(id: String): Product? {
val objectId = ObjectId(id)
return productCollection.find(
eq(«_id», objectId)
).firstOrNull()
}
This time, we use the find method. And this function returns the FindFlow which is the Flow implementation for find operations.
This function allows us to pass filters as arguments to it. And to get the particular product, we use the eq filter. One of the many filters that we can find in com.mongodb.client.model.Filters. We must remember that our identifier is of the ObjectId type, so we create a new instance from our String value.
Lastly, we invoke the firstOrNull– the terminal operator that returns the first element emitted by the flow and then cancels flow’s. We leverage the fact that only one element with such an identifier can be found in our database.
So with all of that done, let’s get back to the Application.kt and test this function:
val found = runBlocking {
productRepository.findById(«67bd62f974edd96bbd59874a»)
}
val notFound = runBlocking {
productRepository.findById(«67bd62f974edd96bbd59874b»)
}
// Logs:
// Product(id=67bd62f974edd96bbd59874a, name=Product 1, description=Description 1, price=19.99, category=TOOLS, tags=[EXCLUSIVE, BESTSELLER])
// null
As we can see, our test proves that findById not only works but also it simply returns null when nothing was found. No unexpected exceptions, etc.
Updating Products
As the next step, let’s add the function responsible for updating products:
suspend fun update(id: String, product: Product): Product? {
val objectId = ObjectId(id)
return productCollection.findOneAndReplace(
filter = eq(«_id», objectId),
replacement = product,
options = FindOneAndReplaceOptions().returnDocument(ReturnDocument.AFTER)
)
}
Again, this function is a suspended function, and again we use the same combination of the eq filter and ObjectId to find the item we are interested in.
The function that we use- findOneAndReplace– allows us to simply replace the existing document by passing a new version. Nevertheless, by default, this function returns the object before the update! And in my opinion, it makes more sense to return the updated versions in this case. And that’s why we specify the additional option.
As a note: if you would like to update just some fields, then the findOneAndUpdate may be a better choice.
With all of that done, let’s test our functionality:
val updated = runBlocking {
productRepository.update(
id = «67bd62f974edd96bbd59874a»,
product = Product(
name = «Updated Product 1»,
description = «Updated Description 1»,
price = 20.11,
category = ProductCategory.FOOD,
tags = listOf(ProductTag.BESTSELLER)
)
)
}
val notUpdated = runBlocking {
productRepository.update(
id = «67bd62f974edd96bbd59874b»,
product = Product(
name = «Updated Product 2»,
description = «Updated Description 3»,
price = 20.11,
category = ProductCategory.FOOD,
tags = listOf(ProductTag.BESTSELLER)
)
)
}
// Logs:
// Product(id=67bd62f974edd96bbd59874a, name=Updated Product 1, description=Updated Description 1, price=20.11, category=FOOD, tags=[BESTSELLER])
// null
As we can see, everything works as expected. Our function returns the updated product. And moreover, it does not throw any exceptions when a product is not found!
Delete Products
Nextly, let’s take a look at how we can remove products from our database:
suspend fun deleteById(id: String): Boolean {
val objectId = ObjectId(id)
val deleteResult = productCollection.deleteOne(
eq(«_id», objectId)
)
return deleteResult.deletedCount == 1L
}
At this point of our MongoDB coroutines tutorial, I think the code is quite descriptive. We use the same pattern we did previously to find by ID and we utilize the function from DeleteResult to get the count of deleted items.
Of course, given we have only one item with a particular _id, the function returns true only if the count is equal to one.
And again, a small note from my end if you would like to return the deleted product instead, then you can use the findOneAndDelete instead.
I will skip the testing part here, you must trust me
Case-insensitive Search In MongoDB
As the last step, I will show you how to utilize the function that we already know (find) to perform a case-insensitive search in MongoDB:
fun find(
title: String,
): Flow<Product> {
return productCollection.find(
regex(Product::name.name, title, «i»)
)
}
As we can see, this time we make use of the regex function, that will add the… regex filter And thanks to the “i” option, the whole search will be case-insensitive.
Additionally, we make use of the name field reference. We could use a simple String value- “name”- but thanks to our approach we won’t need to remember to manually update the name in case of the update.
Lastly, I just wanted to mention here that this is one of the approaches to tackle this issue. According to the Mongo docs, we have also two more options:
1. Create a case-insensitive index with a collation strength of 1 or 2, and specify that your query uses the same collation.
2. Set the default collation strength of your collection to 1 or 2 when you create it, and do not specify a different collation in your queries and indexes.
Adding Sorting and Pagination to Search Results
Lastly, let’s make a small adjustment to add pagination and sorting to our logic.
To do so, let’s implement the Order Enum first:
enum class Order {
ASC, DESC
}
And with that done, let’s get back to our repository:
fun find(
title: String,
sortBy: String,
order: Order,
limit: Int,
skip: Int,
): Flow<Product> {
val sort = when (order) {
Order.ASC -> ascending(sortBy)
Order.DESC -> descending(sortBy)
}
return productCollection.find(
regex(Product::name.name, title, «i»)
)
.sort(sort)
.limit(limit)
.skip(skip)
}
As we can see, our function allows us to pass 4 more arguments during the invocation: sortBy, order, limit, and skip.
So from now on, we can not only perform the search but also set the limit of results, ordering, as well as the order of items.
Summary
And that’s all for this tutorial on how to work with MongoDB and Kotlin coroutines in Ktor.
I hope you enjoyed it, and if you would like to learn more Ktor concepts in a fully hands-on manner, then check out my course.
Lastly, if you would like to get the whole codebase, then you can find it in this GitHub repository.
The post MongoDB with Kotlin Coroutines in Ktor appeared first on Codersee — Kotlin on the backend.